
In today's digital age, screen recording has become an essential skill for various purposes, ranging from creating informative tutorials to capturing memorable moments in a video game. Whether you're a professional content creator, a business owner, or simply someone who wants to share their knowledge and experiences, knowing how to screen record can greatly enhance your ability to communicate and engage with your audience.
In this comprehensive guide, we will walk you through the step-by-step process of screen recording on different devices and operating systems, including laptops, PCs, Macs, iPhones, and Android devices. We will also explore the various tools, software, and techniques you can use to make your screen recordings more professional and impactful.
Note: Throughout this guide, we will refer to Bonjoro's free screen recording tool. You can try it out and sign up for free here.
How to Screen Record on a Mac or Macbook
Mac users have the advantage of built-in screen recording tools that make the process quick and easy. There are two main methods you can use to screen record on a Mac: using the built-in screen recorder or utilizing third-party software like QuickTime or Bonjoro.
Using the Built-In Screen Recorder
Mac computers come with a built-in screen recording tool called "Screen Recording." This tool allows you to capture your screen, record audio, and save the recording as a video file.
- Here's how you can use the built-in screen recorder on a Mac:
- Open the application or window you want to record.
- Press "Command + Shift + 5" to open the screen recording toolbar.
- In the toolbar, you can choose to record the entire screen or select a specific portion to record.
- Customize your recording settings, such as choosing where to save the recording and whether to include audio.
- Click the "Record" button or press "Spacebar" to start the recording.
- To stop the recording, click the "Stop" button in the menu bar or press "Command + Control + Escape."
Once you stop the recording, the video file will be saved to your specified location. You can then edit or share the recording as needed.
Screen Recording with QuickTime
Another option for screen recording on a Mac is to use QuickTime, a multimedia player and editing software that comes pre-installed on Mac computers. QuickTime allows you to record your screen, audio, and webcam simultaneously.
To screen record with QuickTime, follow these steps:
- Open QuickTime Player from the Applications folder.
- Click on "File" in the menu bar and select "New Screen Recording."
- Click the red record button in the QuickTime Player window.
- To record your entire screen, click anywhere on the screen.
- To record a specific portion of the screen, click and drag to select the desired area.
- If you want to include audio, click on the small arrow next to the record button and select your audio source.
- Click the record button again to stop the recording.
- Save the recording to your desired location.
How to Screen Record on a Windows Laptop or PC
Windows users also have various options for screen recording, depending on their operating system version and personal preferences. In this section, we will explore how to screen record on Windows 10 and Windows 11, as well as the use of third-party software like Xbox Game Bar.
Screen Recording on Windows 11
Record any portion of your screen with Snipping Tool
Snipping Tool is a built-in application on Windows 11 that allows you to capture screenshots. However, with the latest update, Snipping Tool now also offers screen recording capabilities, making it a convenient option for capturing specific portions of your screen.
To start recording your screen with Snipping Tool:
- Open the Start menu and search for "Snipping Tool".
- Once opened, click on the Record button in the top toolbar and select New.
- Use your mouse to drag and drop a rectangle, indicating the portion of the screen you want to record.
- Click Start, and a 3-second countdown will begin.
- After you finish recording, click Stop. Your recording can then be copied into memory, shared via the Share dialog, or saved in the Videos folder.
It's important to note that Snipping Tool's screen recording feature has some limitations. Currently, it does not support audio recording or a "Spot Light" feature. However, you can edit the recorded video using a program like Microsoft's Clipchamp app. The only supported format for recordings is MP4, and there is no keyboard shortcut to jump directly into recording like there is for taking screenshots (CTRL+Shift+S).
Screen Recording with Xbox Game Bar
For Windows 10 users, the Xbox Game Bar offers a convenient and accessible screen recording option. Although primarily designed for gaming, the Xbox Game Bar can be used for general screen recording purposes.
To screen record with Xbox Game Bar, follow these steps:
- Press "Windows key + G" to open the Xbox Game Bar.
- Click on the "Capture" button in the Xbox Game Bar overlay.
- Customize your recording settings, such as audio sources and quality.
- Click the "Record" button to start the recording.
- When you're done, click the "Stop" button in the Xbox Game Bar overlay to finish the recording.
- The recording will be saved to the "Captures" folder in your Videos library.
Xbox Game Bar provides a straightforward and user-friendly interface for screen recording on Windows 10. While it may not offer advanced editing features, it is a reliable option for capturing your screen and sharing it with others.
How to Screen Record on a Chromebook
Chromebook users can also enjoy the convenience of built-in screen recording tools. Chrome OS offers a native screen recording feature that allows you to capture your screen, system audio, and microphone.
Using the Built-In Screen Recorder Chromebook
To screen record on a Chromebook using the built-in screen recorder, follow these steps:
- Open the application or window you want to record.
- Press "Ctrl + Shift + Overview" or "Ctrl + Shift + F5" to open the screen recorder.
- In the screen recorder menu, customize your recording settings, such as choosing the audio sources.
- Click the "Record" button to start the recording.
- To stop the recording, click the "Stop" button in the screen recorder menu or press "Ctrl + Shift + F5."
Once the recording is stopped, it will be saved to the "Downloads" folder by default. You can then edit, trim, and share the recording as needed.
How to Screen Record on an iPhone
Screen recording on an iPhone can be incredibly useful, whether you want to create tutorials, capture gameplay, or share your screen with others. iOS devices have a built-in screen recording feature that allows you to record your screen and audio easily.
Screen Recording on iOS
To screen record on an iPhone or iPad, follow these steps:
- Open the Control Center by swiping down from the top-right corner (iPhone X or later) or swiping up from the bottom (iPhone 8 or earlier).
- Tap the "Screen Recording" button, which looks like a circle with a dot inside.
- A countdown will appear, indicating that the screen recording is about to start.
- To include audio, long-press the "Screen Recording" button to open the audio options. Choose either "Microphone Off" or "Microphone On."
- Tap the "Start Recording" button to begin screen recording.
- To stop the recording, tap the red recording indicator in the status bar at the top of the screen and select "Stop."
The screen recording will be saved to your Photos app, where you can access, edit, and share it like any other video.
How to Screen Record on Samsung and Other Android Devices
Screen recording on Android devices, including Samsung phones, can be done using the built-in screen recording feature available on Android 11 or higher. This feature allows you to capture your screen, system audio, and microphone.
Screen Recording on Android 11 or Higher
To screen record on an Android device running Android 11 or higher, follow these steps:
- Swipe down from the top of the screen to open the notification panel.
- Look for the "Screen Record" option and tap on it.
- If you don't see the "Screen Record" option, swipe left to reveal more options, and tap on the "Screen Record" icon.
- A floating toolbar will appear with various recording options.
- Customize your recording settings, such as choosing the audio sources and video quality.
- Tap the "Start" button to begin screen recording.
- To stop the recording, tap the "Stop" button in the floating toolbar or swipe down the notification panel and tap "Stop" in the ongoing screen recording notification.
The screen recording will be saved to your device's gallery or screen recording folder, depending on your device's settings. From there, you can access, edit, and share the recording as needed.
Creating Professional Screen Recordings with Bonjoro
While there are various editing tools available, you may prefer an all-in-one solution that provides comprehensive screen recording and sharing capabilities. Bonjoro's free screen recording tool is a great option for creating professional-quality screen recordings directly from your Chrome browser.
Here's how you can use Bonjoro's screen recording tool:
Visit the Bonjoro website and sign up for a free account.
- Download the Bonjoro chrome extension.
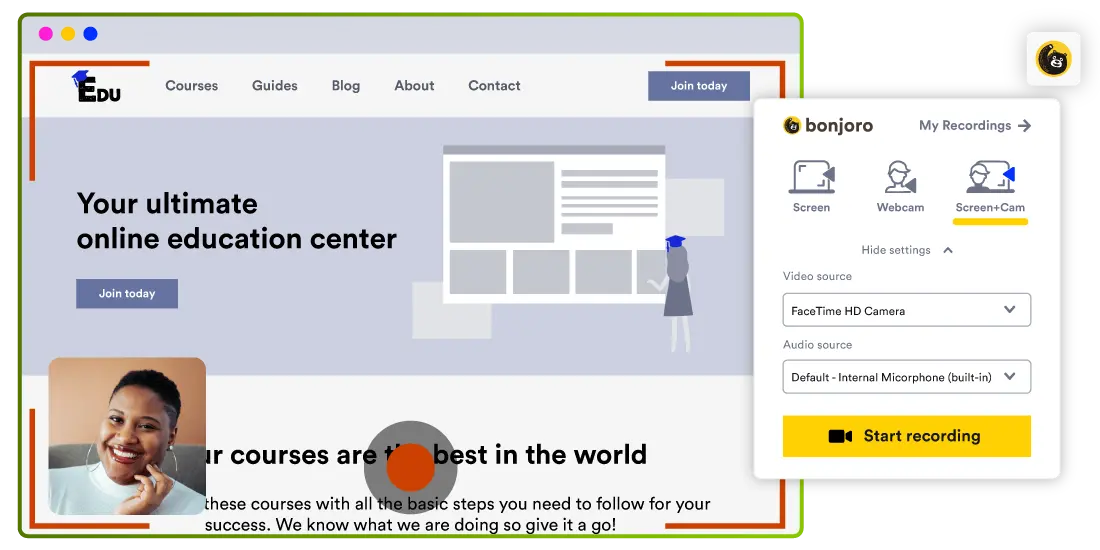
- Once downloaded, click on the extension in your Chrome extensions list.
- Customize your recording settings, such as choosing the screen area and audio sources.
- Click the "Record" button to start the recording.
- When finished, click the "Stop" button to end the recording.
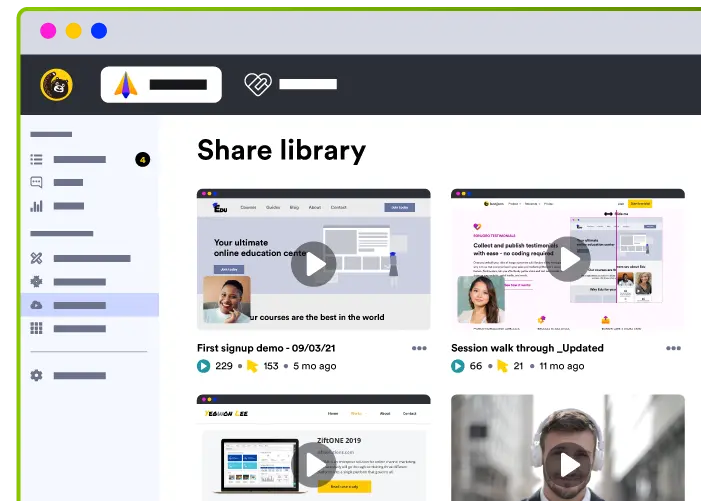
- The recording will be saved to your Bonjoro account, where you can access, edit, and share it.
- From the Bonjoro dashboard, you can customise your recording with your own branding and call-to-actions.
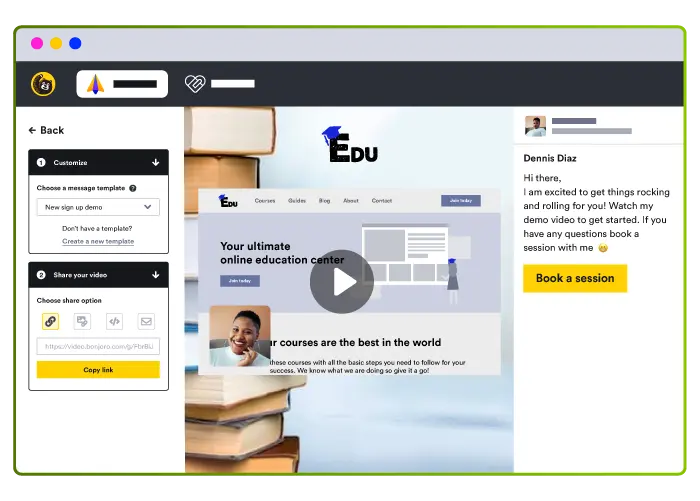
- Finally, you can share the recording by generating a unique link or embedding it on your website or blog.
Bonjoro's screen recording tool offers a user-friendly and seamless experience, making it easy to create professional screen recordings. Whether you're recording tutorials, presentations, or software demos, Bonjoro can enhance your screen recording workflow and provide a seamless user experience.
Enhancing Your Screen Recordings
While basic screen recording can be useful for capturing your screen, enhancing your recordings can take them to the next level. In this section, we will explore various techniques and tools to help you add audio, edit, and polish your screen recordings.
Adding Audio to Your Screen Recordings
Including audio in your screen recordings can greatly enhance the viewer's experience and understanding. By narrating your actions and providing context, you can make your recordings more engaging and informative.
To add audio to your screen recordings, you can use a microphone to record your voice while capturing your screen. Most devices and screen recording software allow you to choose whether to include microphone audio or system audio, or both.
For example, if you're creating a tutorial video, you can provide step-by-step instructions and explanations as you demonstrate the process on your screen. This allows viewers to follow along more easily and understand the purpose behind each action.
Editing and Polishing Your Screen Recordings
Once you've recorded your screen, you may want to edit and polish the recording to make it more professional and engaging. Editing can help you remove any unnecessary parts, add captions or annotations, and enhance the overall visual and auditory experience.
There are various video editing software options available, ranging from simple and user-friendly tools to more advanced and feature-rich applications. Some popular video editing tools include Adobe Premiere Pro, Final Cut Pro, and iMovie.
When editing your screen recordings, consider the following techniques:
- Trim and remove unwanted parts: Cut out any mistakes, pauses, or irrelevant sections to keep the recording concise and focused.
- Add captions or subtitles: Include text overlays to provide additional context or make your content more accessible to viewers.
- Enhance visuals: Adjust brightness, contrast, or color levels to improve the overall visual quality of the recording.
- Include transitions and effects: Add smooth transitions or visual effects to make the video more visually appealing and polished.
- Incorporate a professional intro and outro: Create an introduction and conclusion to provide a consistent and branded experience for your viewers.
By applying these editing techniques, you can transform your screen recordings into professional and engaging videos that captivate your audience.